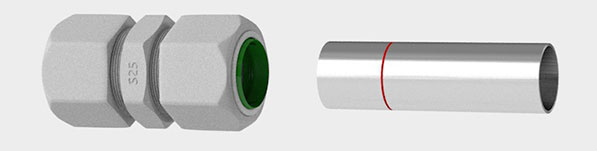
After removing burrs on the cut surface of the pipe, mark the line
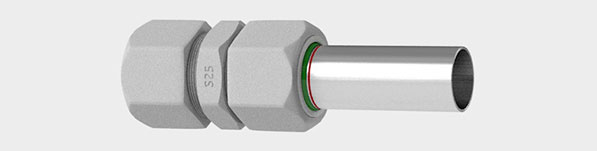
STEP 2.
Push the pipe in until the marked line is located
at the end of the fitting, and tighten the Nut by hand
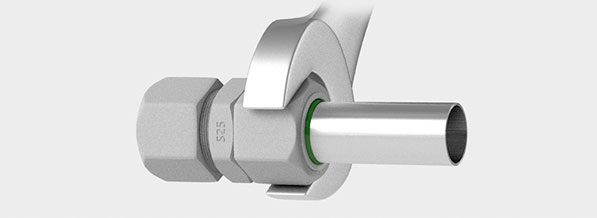
STEP 3.
Using a tool, tight the Nut to the end of the thread
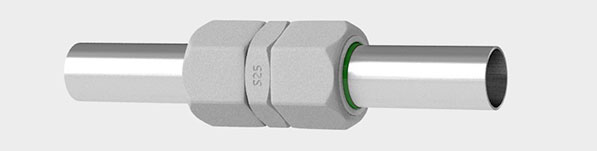
STEP 4.
Complete the installation by assembling the other side in the same way
Nominal Size
10
15
20
25
32
Line Marking Length(㎜)
24±1
27±1
29±1
35±1
39±1
* Drag the ticket to the side to check.
Precautions for assembly
Cut the pipe vertically using a pipe cutter, and remove the burr thoroughly.
Make sure that the pipe is inserted sufficiently until the Nut end touches the marked line and tighten the nut.
Burying may cause external corrosion, so wrap pipes and fittings with anti-corrosion tape or plastic before burying.
When temporarily storing at the work site, keep the fittings covered with plastic packaging and covers.
Visually inspect the inside of the fitting for foreign substances before tightening, and if foreign substances are found, remove them and tighten them.
When inserting a pipe, insert the joint and pipe in a straight line. If inserting the pipe is not smooth, loosen the nut about half a turn and insert it.
Damage to the Ferrule and Seal-Washer during dismantling after complete construction is normal, and normal performance is not achieved during re-construction, so replacement is recommended.